Samstag, 15. August 2009

Basic setup for rendering left and right eye images to produce stereoscopic or anaglyphic pictures ...

In your basic Vue scene there is always a "main camera" and with it comes a "top camera".

Work on your scene and find the right point of view for your main camera. Once your scene and camera position are settled, you need not only one, but two different camera views, to simulate a left and right eye point of view.

Surely you could just use this one main camera and move it sideways to the left or right to simulate the different eye views, but for better control to find the best distance of both cameras for your scene and scale of your scene, it might be better, to use two cameras, which can be switched back and forth for easier setup.

The main camera view can be used as either left or right eye view. So you need one more camera (just leave the top camera as top ...), which can be added in the "Camera Manager".

You can get to the Camera Manger by either double-click on the main camera in the objects/layer list and there in the "Advanced Camera Options ..." window the button called "Camera Manger" or you choose in the "Display" menue "Create Camera..."
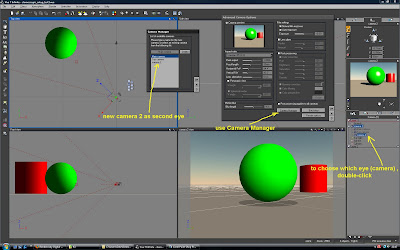


Here i call it "camera 2".
This newly created camera 2, at first, will be at the same position as the main camera.
The main camera in my example will be simulating the right eye POV.

Now you have to move the camera 2 to the new position for the left eye POV.

Since the human eyes are positioned parallel to each other, just a certain distance apart, you want to move the camera 2 in a parallel movement away from the main camera.
The best way to do this, is to select camera 2 and at the appearing Gizmo choose "L" for using the "local coordinates" system. The camera 2 will slide in the X axes away from the main camera, just the way we need it to find a fitting left eye POV.
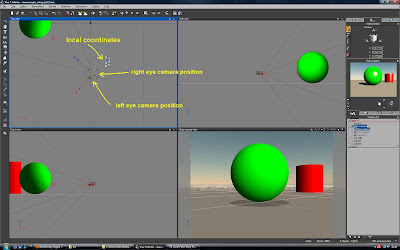


Like mentioned above, it depends on your scenery, objects and the scale of your scenery, to find a good distance between both cameras.
The eyes (cameras) distance is important, too, to control the strength and correctness of your 3D image effect.


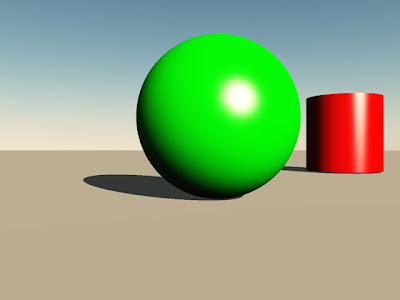
Left eye POV rendered:


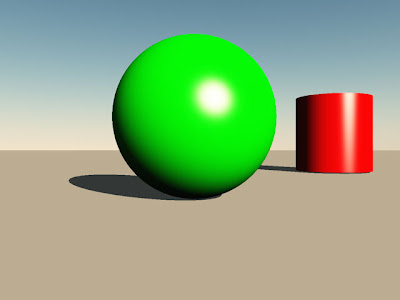
Right eye POV rendered:


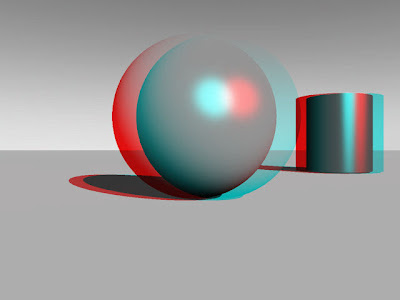
Here is the resulting image, combined in a free program called "StereoPhoto Maker" - using the "Anaglyph" mode with red/cyan colors:


Maybe i can find a calculable formula for the relation between eye distance and scenery scale - and i will add it to this little tutorial some day - but for now you'll have to go by trial and error to find a good eye distance - but it's not really too hard, to get quick results, IMHO.

Freitag, 14. August 2009

To "lock" a terrain or object to it's position and secure it from being moved, scaled or newly oriented ...

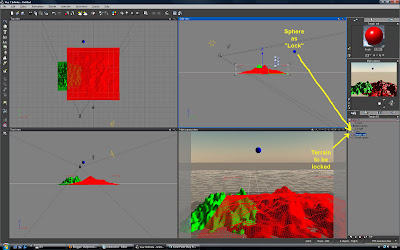
If you try to "lock" a terrain or object in a scene, so it won't be movable or changed in size or orientation by accident, there is a workaround setting possible - at least in Vue 7 Infinite - not sure, if there are all those options in smaller or older versions of Vue available.

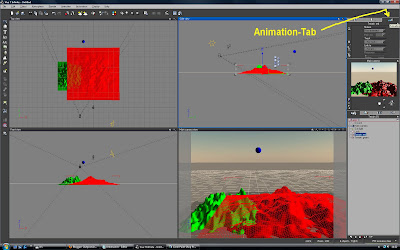
You can use a function in the "Animation" tab in the top right corner - using it, you don't even have to use the normal build in layer lock function to be selected.

Say you have two terrains in your scene, but one is suppose to be locked from an accidental movement :

- add one simple primitive object, for instance a sphere to the scene and position it way far from all objects/terrains in the scene, doesn't matter left/right/up/down .... just that it's not to be seen and able to touch/select anymore - maybe call it "lock" for better recognition.
(But remember, you have to leave this "lock"-object in the main layer 1, otherwise you won't be able to select it in the "to link" list !)

- add a sphere (or any other simple object) being the "lock" and select the terrain/object that is suppose to be "locked" in position


- click on the "Animation" tab in the top right corner


- in the "link to" selection link this terrain to this sphere we named "lock"


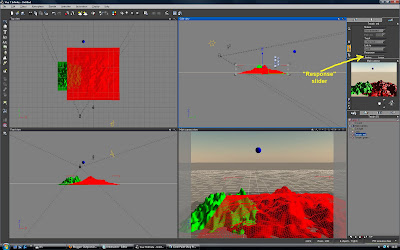
- below this "link to" selection is a slider called "Response"


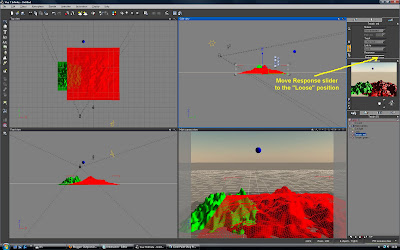
- move the slider to the total right, so you have a total "Loose" response selected


- that's basicly all there is to do


What happens now, if you accidently select this not to be moved terrain and wanting to move the XYZ-gizmo ?

You will get a warning window saying "You cannot change the relative position, size or orientation of objects that are connected using loose dynamics" and asking "Do you want to revert to "perfect" forward dynamics ?"


Here you click on "Cancel", since you want to keep it in this "Loose" dynamics setup and therefore it will stay always in position, 'cause it stops you from making any movements, size or orientation changes ... !

Logically you can add as many "lock" objects to your scenes as you want for more control - but basicaly just this one sphere is good enough to work as a "lock" for all following terrains/objects using the above described way.

Maybe this can be helpful to some of you, that don't like to work with the normal layer lock function ...